
Never baked anything in your life? Perfect — this is the right place to start.
Baked dog treats are genuinely one of the most forgiving things anyone can make in a kitchen.
No precise temperatures, no delicate timing, no catastrophic failures waiting to happen. If the oven turns on and a mixing bowl exists, these recipes are completely doable.
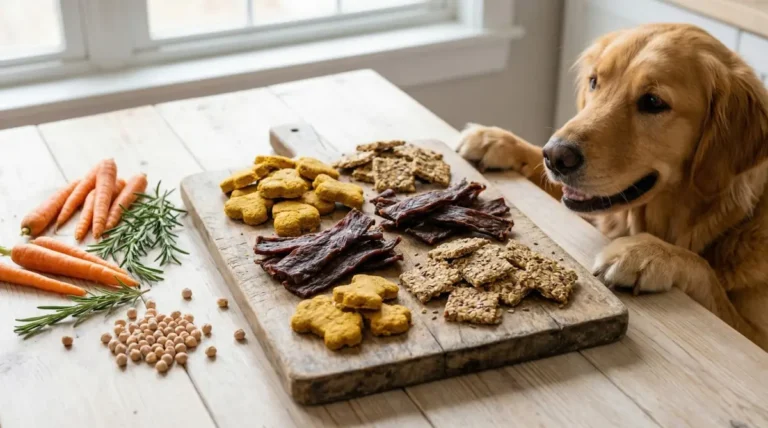
This article covers 10 beginner-friendly baked dog treat recipes — simple ingredients, straightforward instructions, and results that make dogs act like the most talented baker in the world just walked through the door. Which, after making these, might actually be true.
⚠️ Quick reminder: Always check peanut butter labels for xylitol before using — it’s toxic to dogs and shows up in more brands than expected. Treats should make up no more than 10% of a dog’s daily calorie intake.
For days when you don’t want to turn on the oven, we’ve got you covered with some quick no-bake options that are just as delicious.
10 Easy Baked Dog Treats Recipes for Beginners
Recipe 1: 3-Ingredient Peanut Butter Biscuits
The first recipe every beginner should make. Three ingredients, one bowl, and a batch of biscuits that most dogs consider the highlight of their entire week.
This recipe is forgiving with measurements, hard to mess up, and produces a reliably crunchy biscuit that stores well.
3-Ingredient Peanut Butter Biscuits
Crunchy, simple & beginner-proof — just mix, roll, and bake
Ingredients
1 cup peanut butter
⚠️ Must be unsalted & xylitol-free — xylitol is toxic to dogs
½ cup pumpkin puree
plain canned only — not pumpkin pie filling
2 cups whole wheat flour
oat flour works as a grain-free alternative
Instructions
Preheat oven to 350°F (175°C).
Mix peanut butter and pumpkin puree until smooth.
Stir in flour until a firm dough forms — it should hold its shape without sticking.
Roll out on a lightly floured surface to ¼ inch thickness.
Cut into shapes with a cookie cutter or slice into squares.
Bake 20–25 minutes until golden and firm.
Cool completely before serving — they harden as they cool.
💡 Beginner tip: Dough too sticky to roll? Add flour 1 tablespoon at a time until it cooperates. Moisture level varies by peanut butter brand — completely normal and easy to fix.
📦 Storage
🗄️ Room temp: 5 days (airtight container)
❄️ Fridge: 2 weeks
🧊 Freezer: 3 months
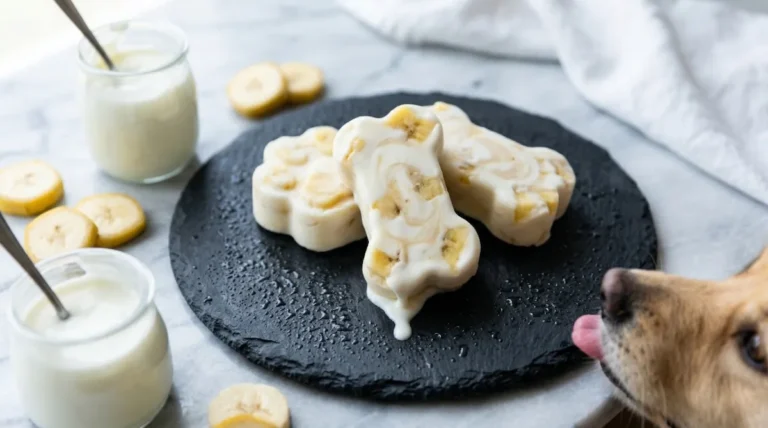
Recipe 2: Banana Oat Soft Bites
Perfect for beginners who want something even simpler than biscuits — no rolling, no cutting, no shaping required.
Just mix, drop, and bake. These come out soft rather than crunchy, which also makes them ideal for senior dogs, puppies, or any dog that struggles with very hard treats.
Banana Oat Soft Bites
Soft, naturally sweet & perfect for training — no flour, no fuss
Ingredients
2 ripe bananas, mashed
the riper the better — more natural sweetness & easier to mash
1½ cups rolled oats
forms the base — no flour needed
¼ cup natural peanut butter
⚠️ Must be xylitol-free — xylitol is toxic to dogs
Instructions
Preheat oven to 350°F (175°C).
Mash bananas until completely smooth.
Mix in peanut butter until fully combined.
Stir in rolled oats until a thick, scoopable mixture forms.
Drop teaspoonfuls onto a lined baking sheet. Flatten slightly for a more uniform shape — they won’t spread on their own.
Bake 12–15 minutes until set and lightly golden.
Cool completely before serving.
💡 Beginner tip: These don’t spread during baking — what goes in is what comes out. Flatten each bite slightly before baking for a cleaner, more uniform result.
📦 Storage
❄️ Fridge: 1 week (airtight container)
🧊 Freezer: 3 months
Recipe 3: Sweet Potato and Oat Biscuits
Two ingredients that work together beautifully — sweet potato acts as a natural binder and flavor base while oats provide structure and fiber.
This recipe requires slightly more prep than the first two because the sweet potato needs to be cooked first, but it’s still firmly in beginner territory.
Sweet Potato and Oat Biscuits
2 ingredients, naturally sweet & grain-friendly — as simple as it gets
Ingredients
1 cup sweet potato, cooked and mashed
about 1 medium sweet potato — roasted, steamed, or microwaved
1½ cups oat flour
blend rolled oats until fine — no need to buy separate flour
Instructions
Preheat oven to 350°F (175°C).
Cook sweet potato until completely soft. Cool, then mash until smooth — lumps make uneven biscuits.
Mix mashed sweet potato with oat flour until a firm dough forms.
Roll to ¼ inch thickness on a lightly floured surface.
Cut into shapes and place on a lined baking sheet.
Bake 20–25 minutes until firm and slightly crisp at the edges.
Cool completely before serving.
💡 Beginner tip: Fastest method — microwave the sweet potato for 5 minutes. Pierce it a few times first, microwave until completely soft, then scoop the flesh out once cool. Done in a fraction of the time.
📦 Storage
❄️ Fridge: 1 week (airtight container)
🧊 Freezer: 3 months
Recipe 4: Pumpkin and Egg Biscuits
Eggs are the unsung hero of beginner dog treat baking. They bind everything together, add protein, and make doughs significantly easier to work with — which is exactly what a first-time treat baker needs.
Combined with pumpkin, this recipe produces a smooth, workable dough that rolls and cuts cleanly every time.
Pumpkin and Egg Biscuits
Extra-crispy with a one-step oven trick — 3 ingredients, big crunch
Ingredients
1 cup plain canned pumpkin
✦ Plain only — not pumpkin pie filling
2 eggs
binds the dough and adds protein
2½ cups whole wheat flour
add gradually — stops at firm dough consistency
Instructions
Preheat oven to 350°F (175°C).
Whisk eggs until lightly beaten.
Mix in pumpkin until smooth.
Gradually stir in flour until a firm dough forms.
Roll to ¼ inch thickness and cut into shapes.
Place on a lined baking sheet and bake 25–30 minutes until firm throughout.
Turn off the oven and leave biscuits inside for 10 more minutes — this dries them out gently for extra crunch.
Cool fully on a wire rack before serving.
💡 Beginner tip: Don’t skip Step 7 — the residual oven heat dries the biscuits out gently without burning them. It makes a noticeable difference in final texture.
📦 Storage
🗄️ Room temp: 5 days (airtight container)
❄️ Fridge: 2 weeks
🧊 Freezer: 3 months
Recipe 5: Carrot and Applesauce Biscuits
A naturally sweet, crunchy biscuit that doubles as a light dental health aid.
The texture of a well-baked carrot biscuit helps mechanically remove light plaque buildup during chewing — not a replacement for dental care, but a genuinely useful bonus.
Applesauce acts as the moisture and binding agent, keeping the ingredient list minimal.
Carrot and Applesauce Biscuits
Naturally sweet, fiber-rich & crisp — 4 simple ingredients
Ingredients
1 cup unsweetened applesauce
✦ Unsweetened only — no added sugar or spices
1 cup carrots, finely grated
✦ Grate as fine as possible — use the finest side of a box grater
2 cups oat flour
blend rolled oats until fine if no oat flour on hand
1 egg
binds the dough together
Instructions
Preheat oven to 350°F (175°C).
Mix applesauce, grated carrots, and egg together.
Stir in oat flour until a firm dough forms.
Roll to ¼ inch thickness and cut into shapes.
Bake on a lined sheet for 22–25 minutes until crisp.
Cool completely before serving — these firm up significantly as they cool.
💡 Beginner tip: Grate carrots as finely as possible — coarse pieces make the dough harder to roll and produce an uneven texture. The finest side of a box grater works perfectly.
📦 Storage
🗄️ Room temp: 5 days (airtight container)
❄️ Fridge: 2 weeks
Recipe 6: Chicken and Oat Savory Biscuits
Not every dog is enthusiastic about sweet-flavored treats — some dogs want something that smells and tastes like actual food.
These savory biscuits use canned chicken as both the protein and moisture source, making the ingredient list short and the flavor impact genuinely high.
Dogs that ignore fruit-based treats tend to go absolutely wild for these.
Chicken and Oat Savory Biscuits
Protein-packed, savory & fridge-ready — 3 ingredients, no salt added
Ingredients
1 can chicken in water, drained and mashed
⚠️ No salt added — check the label before buying
1½ cups oat flour
blend rolled oats until fine if no oat flour on hand
1 egg
binds the dough together
Instructions
Preheat oven to 350°F (175°C).
Drain canned chicken thoroughly and mash until no large chunks remain.
Mix mashed chicken and egg together.
Stir in oat flour until a firm dough forms — add 1 tablespoon of water at a time if the dough is too dry to come together.
Roll to ¼ inch thickness and cut into shapes.
Bake on a lined sheet for 20–25 minutes until firm and lightly golden.
Cool completely before serving.
💡 Heads up: These contain meat — do not store at room temperature. Fridge or freezer only. Label the container with the date so you don’t lose track.
📦 Storage
❄️ Fridge: 5 days (airtight container)
🧊 Freezer: 3 months
Recipe 7: Peanut Butter and Banana Cookies
If the first three recipes have been mastered and something slightly more cookie-like is on the agenda, this recipe delivers a softer, chewier result that sits somewhere between a biscuit and a soft cookie.
It’s still completely beginner-friendly — just a slightly different texture outcome that some dogs strongly prefer.
Recipe 8: Blueberry and Oat Biscuits
Blueberries bring serious antioxidant value to what would otherwise be a standard oat biscuit. The anthocyanins in blueberries support immune function and cognitive health — particularly valuable for senior dogs.
These biscuits have a slightly purple tint from the berries, which looks genuinely charming and makes for a great photo :/
Blueberry and Oat Biscuits
Antioxidant-rich, lightly sweet & naturally purple — fresh or frozen works
Ingredients
½ cup blueberries, mashed
✦ Frozen blueberries mash more evenly — recommended over fresh
1 egg
binds the dough together
2 tablespoons honey
use sparingly — just enough for a light natural sweetness
2 cups oat flour
blend rolled oats until fine if no oat flour on hand
Instructions
Preheat oven to 350°F (175°C).
Mash blueberries thoroughly — frozen blueberries mash more easily than fresh.
Mix mashed blueberries, egg, and honey until combined.
Stir in oat flour until a firm dough forms.
Roll to ¼ inch thickness and cut into shapes.
Bake on a lined sheet for 18–22 minutes until firm.
Cool completely before serving.
💡 Beginner tip: Frozen blueberries work better than fresh in this recipe — they mash more evenly and distribute color throughout the dough more consistently. No need to thaw first, just mash straight from frozen.
📦 Storage
❄️ Fridge: 1 week (airtight container)
🧊 Freezer: 3 months
Recipe 9: Peanut Butter and Oat Training Squares
Training treats need to be small, soft enough to eat in one second, and compelling enough to hold a dog’s attention.
These squares deliver all three — cut small, baked to a slightly softer set, and flavored with peanut butter that most dogs would do absolutely anything for.
Peanut Butter and Oat Training Squares
40–50 small squares per batch — soft, high-reward & made for repetition
Ingredients
1 cup natural peanut butter
⚠️ Must be xylitol-free — xylitol is toxic to dogs
2 eggs
binds the batter and adds structure
1½ cups rolled oats
✦ Use rolled oats here — not oat flour, the texture is intentionally heartier
Instructions
Preheat oven to 325°F (160°C) — lower than usual for a softer result.
Mix peanut butter and eggs until smooth and fully combined.
Stir in rolled oats until a thick batter forms.
Spread evenly into a lined 9×9 inch baking pan — aim for about ¼ inch thick.
Bake 18–20 minutes until set but still slightly soft in the center.
Cool completely in the pan before cutting.
Cut into small squares — aim for ½ inch for training-sized bites to maximize the number of treats per batch.
💡 Beginner tip: These are intentionally soft. Want crunchier? Extend baking by 5 minutes, then leave in the turned-off oven to cool — same gentle drying trick as the Pumpkin & Egg Biscuits.
📦 Storage
❄️ Fridge: 1 week (airtight container)
🧊 Freezer: 3 months
Recipe 10: Apple and Cinnamon Biscuits
The celebration recipe of the beginner lineup.
Apple and cinnamon is a combination that smells incredible while baking — genuinely good enough that the humans in the house will be tempted — and produces a sweet, crunchy biscuit that most dogs go completely wild for.
Unsweetened applesauce keeps the ingredient list short while delivering natural apple flavor throughout.
Apple and Cinnamon Biscuits
Warm, fragrant & extra-crispy — the best-smelling bake in the series
Ingredients
1 cup unsweetened applesauce
✦ Unsweetened only — no added sugar or spices
2 cups whole wheat flour
oat flour works as a direct substitute
1 egg
binds the dough and adds structure
¼ teaspoon cinnamon
✦ Dog-safe in small amounts — do not increase the quantity
Instructions
Preheat oven to 350°F (175°C).
Mix applesauce, egg, and cinnamon together.
Gradually stir in flour until a firm dough forms.
Roll to ¼ inch thickness and cut into shapes.
Bake on a lined sheet for 22–25 minutes until golden and firm.
Turn off the oven and leave biscuits inside for 10 more minutes for maximum crunch.
Cool completely on a wire rack before serving.
💡 Beginner tip: The kitchen will smell absolutely amazing during baking. This is not a complaint.
📦 Storage
🗄️ Room temp: 5 days (airtight container)
❄️ Fridge: 2 weeks
🧊 Freezer: 3 months
Quick Reference: All 10 Recipes
| Recipe | Texture | Best For | Bake Time |
| 3-Ingredient PB Biscuits | Crunchy | All dogs, everyday treat | 20–25 min |
| Banana Oat Soft Bites | Soft | Seniors, puppies, training | 12–15 min |
| Sweet Potato & Oat Biscuits | Firm | Savory preference | 20–25 min |
| Pumpkin & Egg Biscuits | Crunchy | All dogs, easy dough | 25–30 min |
| Carrot & Applesauce Biscuits | Crisp | Dental health, light treat | 22–25 min |
| Chicken & Oat Savory Biscuits | Firm | Savory dogs, high-value | 20–25 min |
| PB & Banana Cookies | Soft-chewy | Dogs preferring soft treats | 15–18 min |
| Blueberry & Oat Biscuits | Firm | Senior dogs, antioxidants | 18–22 min |
| PB & Oat Training Squares | Soft | Training rewards | 18–20 min |
| Apple & Cinnamon Biscuits | Crunchy | Celebration, all dogs | 22–25 min |
Beginner Baking Basics: Everything Needed to Get Started
No experience? No problem. Here’s everything a complete beginner needs to know before turning the oven on for the first time.
Essential Equipment
The good news — none of this needs to be expensive or specialized:
- Mixing bowl — one large bowl handles every recipe on this list
- Baking sheet — a standard rimmed baking sheet works perfectly
- Parchment paper or silicone baking mat — prevents sticking and makes cleanup painless
- Rolling pin — a wine bottle works fine in a pinch, genuinely
- Cookie cutters — completely optional, a knife and ruler cuts perfectly good squares
- Wire cooling rack — helps biscuits cool and crisp evenly; a cutting board works as a substitute
That’s the complete beginner toolkit. Total cost if buying everything new is minimal — and most kitchens already have most of it.
The 4 Most Common Beginner Mistakes

1️⃣ Dough too sticky to roll:
Add dry ingredient (flour or oats) one tablespoon at a time until the dough holds its shape. This happens most often with pumpkin and applesauce recipes because moisture content varies between brands.
2️⃣ Biscuits still soft after cooling:
Return to a 300°F (150°C) oven for 10 to 15 minutes. Alternatively, leave in the turned-off oven as it cools — residual heat dries biscuits without burning them. Softness after cooling is the most common beginner issue and the easiest to fix.
3️⃣ Uneven baking — some done, some not:
Usually caused by uneven rolling thickness. Aim for a consistent ¼ inch throughout. Rotating the baking sheet halfway through baking also helps if the oven has hot spots.
4️⃣ Treats going stale quickly:
Homemade treats contain no preservatives — this is the point, but it does mean shorter shelf life than commercial treats. Batch-freeze most of the recipe and keep only 3 to 4 days’ supply at room temperature.
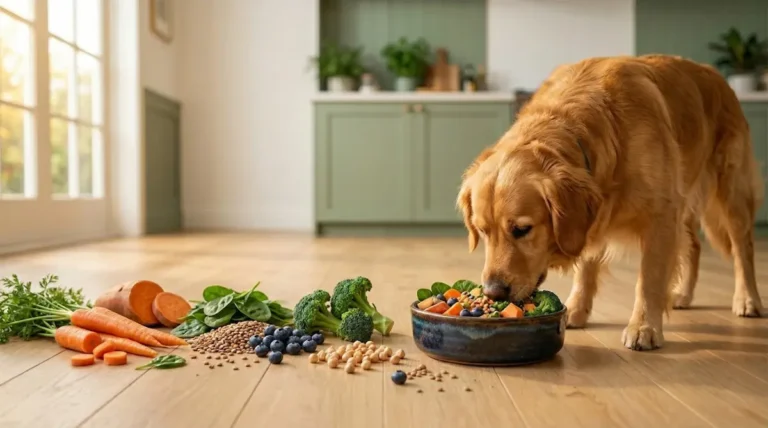
Dog-Safe Ingredients Every Beginner Should Know
Building confidence with these core ingredients opens up dozens of recipe combinations:
Safe and useful
- ✅ Oat flour and rolled oats — gentlest base, works with everything
- ✅ Whole wheat flour — more structure, widely tolerated
- ✅ Natural peanut butter (xylitol-free) — universal flavor booster
- ✅ Plain canned pumpkin — digestive support, great binder
- ✅ Mashed banana — natural sweetener, excellent binder
- ✅ Cooked sweet potato — savory base, nutrient-dense
- ✅ Unsweetened applesauce — gentle sweetness, good moisture source
- ✅ Eggs — best binder available, adds protein
- ✅ Carrots — crunchy texture, low calorie
- ✅ Blueberries — antioxidants, natural color
- ✅ Cinnamon — small amounts only, dog-safe flavor enhancer
Always avoid
- ❌ Xylitol in any form — toxic
- ❌ Chocolate or cocoa
- ❌ Grapes or raisins
- ❌ Onion or garlic powder
- ❌ Nutmeg
- ❌ Macadamia nuts
- ❌ Artificial sweeteners
Storage Guide for Baked Dog Treats
| Treat Type | Room Temperature | Fridge | Freezer |
| Standard baked biscuits | 5–7 days | 2 weeks | 3 months |
| Soft/moist treats | Not recommended | 5–7 days | 3 months |
| Meat or fish-based | Not recommended | 4–5 days | 3 months |
| Egg-based treats | 3–4 days | 1 week | 3 months |
Batch-freezing is the single best habit a beginner can develop. Make a double batch, freeze most of it in labeled bags, and pull out one week’s supply at a time.
The treats taste just as good from frozen — and the freezer supply makes it easy to stay consistent without baking every week.
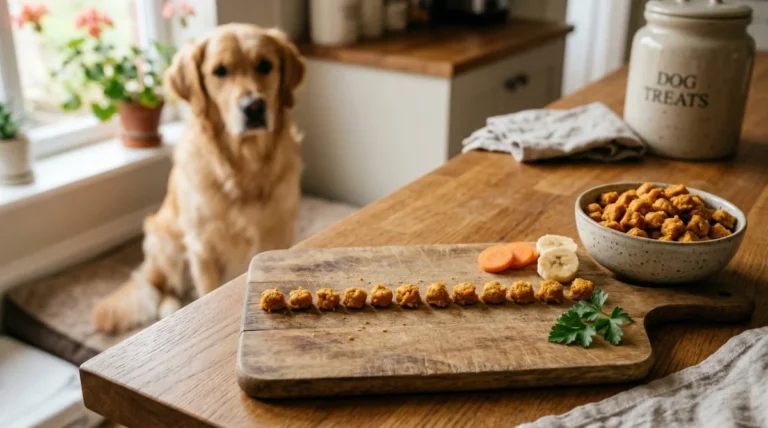
Final Thoughts
Baking dog treats for the first time is genuinely one of those activities that delivers more reward than effort — both for the baker and the dog watching from three inches away. Start with Recipe 1, nail the basics, and work through the list from there.
Every recipe here is forgiving, flexible, and designed specifically for someone who has never done this before. The ingredient lists are short, the instructions are clear, and the margin for error is wide.
IMO the hardest part of the whole process is waiting for the biscuits to cool before the dog gets to try them. 🙂
Now preheat that oven — there’s a very patient dog waiting.