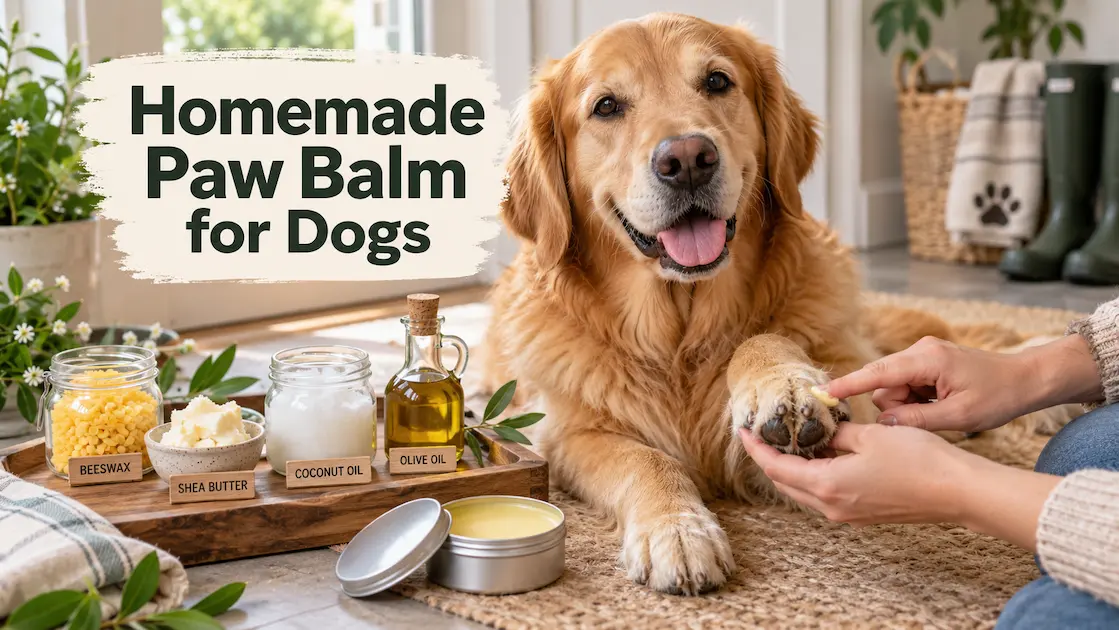
Dry, rough paw pads are common, especially for dogs that spend time on hot sidewalks, winter roads, gravel trails, or dry indoor floors.
A simple paw balm can help moisturize dry pads while adding a light protective barrier between your dog’s paws and everyday environmental stressors.
The good news? You don’t need a long ingredient list.
This homemade paw balm for dogs uses just four ingredients and takes about 10 minutes to make. Keep a small tin near the leash or by the door and you’ll have it ready whenever your dog’s paws need a little extra care.
⚠️ Important: Homemade paw balm is best suited for normal dryness, roughness, and mild surface cracking. Deep cracks, bleeding, swelling, discharge, burns, persistent licking, or limping should be checked by your veterinarian.
🐾 Quick Answer: Homemade Paw Balm for Dogs
For a simple homemade dog paw balm, melt together:
- 2 tablespoons beeswax pellets
- 2 tablespoons unrefined shea butter
- 2 tablespoons coconut oil
- 1 tablespoon sweet almond oil or olive oil
Pour the melted mixture into a small tin or jar and let it cool until firm.
The finished balm should feel solid at room temperature but soften quickly when rubbed between your fingers.
Prep time: About 10 minutes
Best for: Dry, rough, mildly cracked paw pads and everyday paw protection
Makes: Approximately 7 tablespoons of balm
🐶 The Best Homemade Paw Balm Recipe
Step-by-Step: How to Make Homemade Paw Balm
This is the main paw balm recipe I recommend starting with.
The beeswax provides structure and a protective coating, while shea butter and oils help soften and condition dry paw pads.
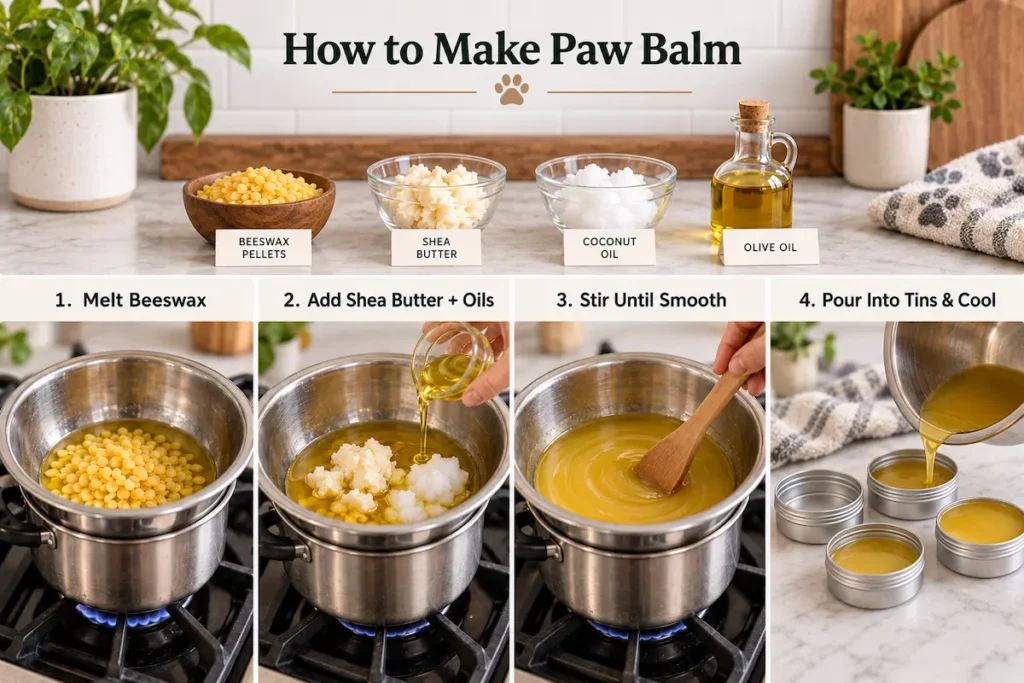
Ingredients
- 2 tablespoons beeswax pellets
- 2 tablespoons shea butter, preferably unrefined
- 2 tablespoons coconut oil
- 1 tablespoon sweet almond oil
No almond oil?
You can substitute olive oil using the same amount.
For a dog paw balm, keep the ingredient list simple. Avoid adding artificial fragrances, perfume oils, or unnecessary essential oils.
Equipment
You’ll need:
- Small heat-safe glass bowl or measuring cup
- Small saucepan
- Silicone spatula or spoon
- Small metal tins or glass jars
- Labels
Instructions
- Add about 1 to 2 inches of water to a small saucepan and bring it to a gentle simmer.
- Place a heat-safe glass bowl over the saucepan to create a simple double boiler. The bottom of the bowl should sit above the water rather than directly in it.
- Add the beeswax pellets first. Beeswax takes the longest to melt, usually around 3 to 5 minutes.
- Once the beeswax has melted, add the shea butter and stir gently until smooth.
- Add the coconut oil and sweet almond oil.
- Continue stirring until everything has melted into a completely smooth liquid.
- Remove the bowl from the heat as soon as the ingredients are combined.
- Carefully pour the mixture into clean tins or jars.
- Leave the containers uncovered at room temperature until the balm has completely cooled and solidified.
This normally takes about an hour.
Once firm, add the lid and label the container with the batch date.
Check the Texture
Your finished paw balm should be:
Firm in the jar → soft when rubbed → easy to spread across the paw pad.
If your balm feels too hard, melt it again and add about ½ tablespoon coconut oil or carrier oil.
If it feels too soft, melt it again and add about ½ tablespoon beeswax.
Small adjustments are completely normal because room temperature, ingredient brands, and climate can all affect the final texture.
How to Store Homemade Paw Balm
Store your paw balm in a cool, dry place away from direct sunlight.
Because coconut oil begins softening in warm temperatures, the balm may become noticeably softer during summer.
In a hot climate, keep it in a cool cupboard rather than leaving it near a sunny window or in a hot car.
Always use clean fingers when taking balm from the container, and discard it if you notice an unusual smell, color, or texture change.
Sensitive Skin Paw Balm Variation
If your dog doesn’t tolerate coconut oil well, you can make a simple sensitive skin paw balm by replacing the coconut oil with jojoba oil.
Use:
- 2½ tablespoons beeswax
- 2 tablespoons shea butter
- 2 tablespoons jojoba oil
- 1 tablespoon sweet almond oil or olive oil
Jojoba behaves slightly differently from coconut oil, so the extra beeswax helps keep the balm firm at room temperature.
Even with simple ingredients, it’s still smart to test a small amount on one paw before using any new topical product regularly.
📋 Paw Balm Quick Reference
| Situation | What to Do |
|---|---|
| Dry or rough paw pads | Apply a thin layer of paw balm and massage it into the pads |
| Mild surface cracking | Moisturize regularly and monitor for improvement |
| Rough trails or gravel | Apply before or after activity as needed |
| Winter salt and ice | Apply a thin barrier before walks and clean paws afterward |
| Hot pavement | Avoid hot surfaces first; balm is only extra protection |
| Deep cracks or bleeding | Contact your veterinarian |
| Swelling or discharge | Stop home treatment and have the paw checked |
| Persistent paw licking | Look for an underlying irritation, allergy, injury, or infection |
🌿 Why These 4 Paw Balm Ingredients Work
A good homemade paw balm doesn’t need twenty ingredients.
Each ingredient in this recipe has a specific job.
Beeswax: The Protective Barrier
Beeswax gives the balm its solid structure and leaves a thin waxy coating over the paw pad.
Because beeswax naturally repels water, that coating may help reduce direct contact between the paw surface and things such as moisture, road salt, dirt, and rough terrain.
Think of it as the protective layer of the recipe.
It isn’t a substitute for dog boots or avoiding unsafe surfaces, but it can be a useful part of a regular paw-care routine.
Shea Butter: The Moisturizer
Shea butter is the main moisturizing ingredient.
Its fatty acids help soften dry skin and improve the pliability of rough paw pads, which is particularly useful when pads start feeling hard, flaky, or mildly cracked.
Unrefined shea butter also retains more of its naturally occurring components than heavily refined versions.
Coconut Oil: Softness and Conditioning
Coconut oil helps soften the beeswax and makes the finished balm much easier to spread.
It is rich in fatty acids and is commonly used as a skin-conditioning ingredient.
Coconut oil also contains lauric acid and has shown antimicrobial properties in certain settings, although homemade paw balm should never be treated as a replacement for veterinary care if a paw is already infected.
Sweet Almond Oil: Lightweight Conditioning
Sweet almond oil gives the balm a smoother texture and helps prevent the beeswax mixture from becoming too hard.
It is an emollient oil, meaning it helps soften and condition dry skin.
Olive oil works well as a practical substitute if that’s what you already have at home.
| Ingredient | Main Job |
|---|---|
| Beeswax | Protective barrier and firmness |
| Shea butter | Moisturizing and softening |
| Coconut oil | Conditioning and spreadability |
| Sweet almond or olive oil | Extra softness and flexibility |
🐾 When and How to Use Paw Balm
Not every dog needs paw balm every day.
How useful it is depends largely on your dog’s environment, activity level, and the condition of the paw pads.
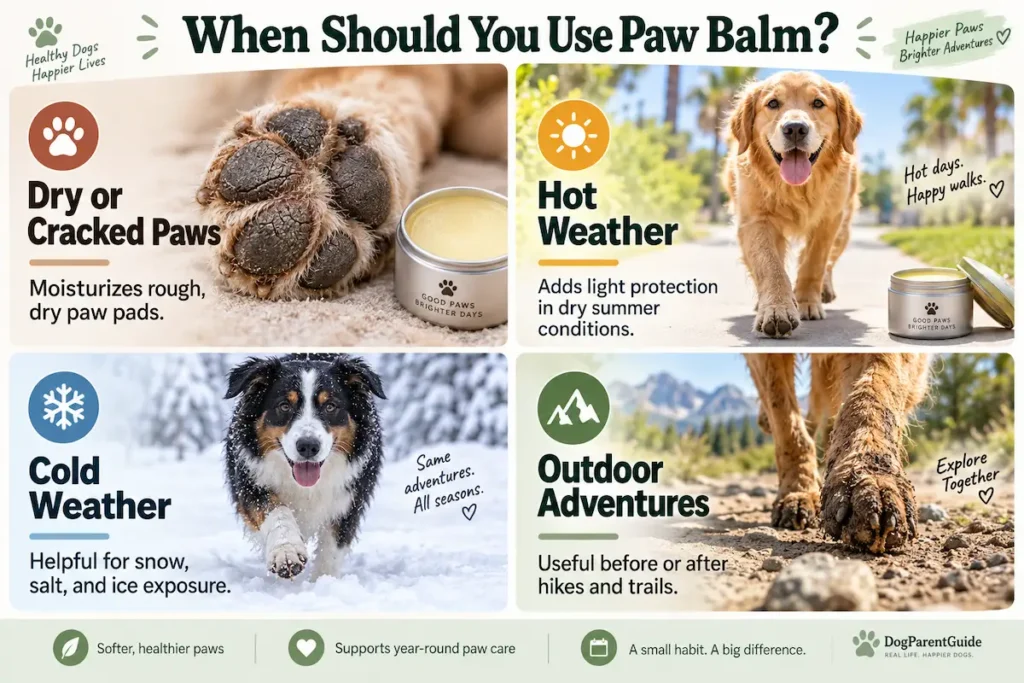
For Dry or Cracked Paw Pads
Healthy paw pads aren’t supposed to feel as soft as human skin.
They naturally have a thicker, tougher surface because they need to provide grip, cushioning, and protection.
But pads that become unusually dry, flaky, rough, or lightly cracked may benefit from regular moisturizing.
For mild dryness:
- Clean the paws.
- Dry them completely.
- Rub a small amount of balm between your fingers.
- Massage a thin layer across each paw pad.
- Give the balm a few minutes to absorb.
For noticeably dry paws, you can apply it once daily for several days and then reduce the frequency once the pads improve.
A useful distinction is surface dryness versus an actual wound.
A shallow dry line across a paw pad may respond well to moisturizing.
A deep split, bleeding crack, swollen area, or painful paw needs more than cosmetic paw care.
In Summer and Hot Weather
Paw balm can provide a light barrier, but it does not make hot pavement safe.
That’s an important distinction.
Asphalt and other hard surfaces can become much hotter than the surrounding air, and a balm cannot reliably prevent a thermal burn when the ground itself is dangerously hot.
During hot weather:
- Walk early in the morning or later in the evening.
- Choose grass or shaded surfaces when possible.
- Check the pavement before a long walk.
- Consider protective dog booties for high-risk surfaces.
- Inspect your dog’s paws when you get home.
You can apply a thin layer of paw balm before normal outdoor activity to reduce dryness and friction, but surface avoidance should always be the first line of protection against extreme heat.
If you notice redness, peeling, blistering, obvious tenderness, or limping after a hot walk, contact your veterinarian rather than simply covering the area with more balm.
In Winter, Snow, Salt and Ice
Winter creates a different paw problem.
Road salt, de-icing chemicals, snow, and repeated wet-dry cycles can leave paw pads noticeably dry and irritated.
Before a winter walk, massage a thin layer of balm across the pads to create an additional barrier.
After the walk:
- Wipe each paw with a warm damp cloth.
- Pay attention to the areas around and between the toes.
- Remove visible salt, grit, and ice residue.
- Dry the paws thoroughly.
- Reapply a small amount of paw balm if the pads feel dry.
Cleaning the paws afterward is especially important because many dogs lick their feet once they return indoors.
How to Apply Paw Balm to Your Dog
You don’t need a thick coating.
In fact, more isn’t necessarily better.
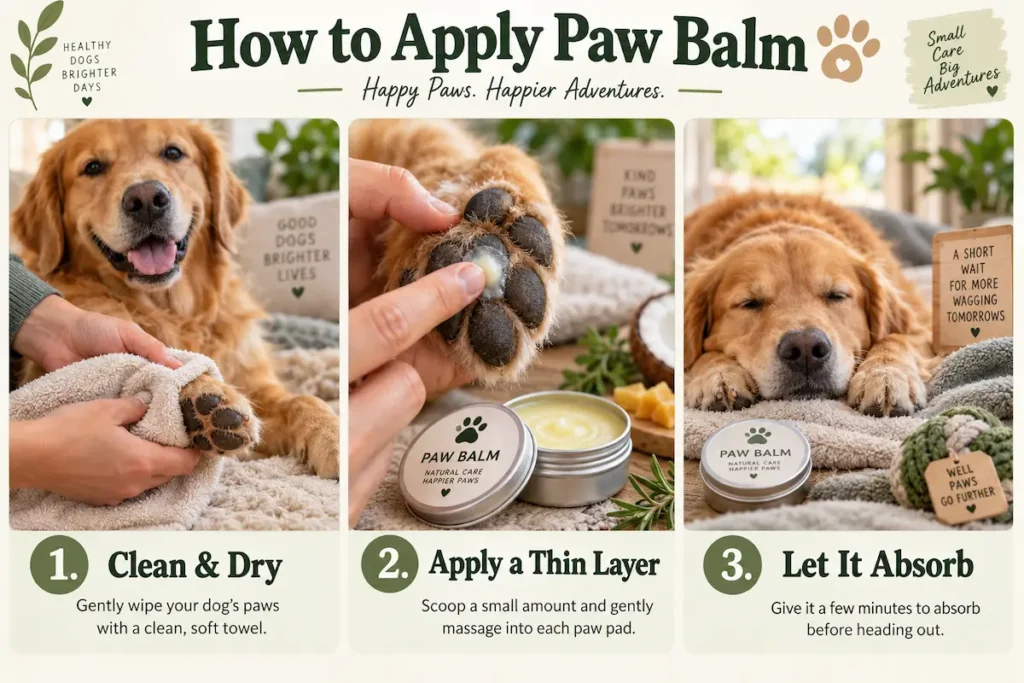
Step 1: Clean the Paws
Remove dirt, sand, salt, or debris first.
Applying balm over dirty paws can trap material against the skin.
Step 2: Dry Them Completely
Pay attention to the areas between the toes.
Constant moisture in these areas can contribute to irritation, so don’t coat wet paws with balm.
Step 3: Warm a Small Amount Between Your Fingers
The warmth of your hands will soften the beeswax and shea butter.
You usually need only a small amount for each paw.
Step 4: Massage It Into the Pads
Spread a thin layer over each large paw pad and the smaller digital pads.
You can gently work it over dry edges and superficial rough patches.
Avoid packing large amounts into the spaces between the toes, especially if those areas are already moist or irritated.
Step 5: Give It Time to Absorb
Try to keep your dog occupied for about five minutes.
A chew, favorite toy, short training session, or bedtime application can make this much easier.
Applying paw balm before bed is especially convenient because it has more time to remain on the pads instead of immediately being rubbed off on the floor.
How Often Should You Use Paw Balm?
There isn’t one perfect schedule for every dog.
For normal maintenance, once or twice per week may be enough.
Dogs that spend a lot of time hiking, walking on concrete, or dealing with very dry weather may benefit from it more frequently.
For temporarily dry paws, you can use a thin layer daily while monitoring the pad condition.
The goal isn’t to make your dog’s paw pads permanently soft.
Paw pads are naturally tough for a reason.
You’re simply trying to prevent excessive dryness and keep the surface flexible enough that it doesn’t begin splitting.
Can Dogs Lick Paw Balm?
Probably.
Most dog parents discover very quickly that anything applied to a paw has a good chance of being investigated with a tongue.
That’s one reason this recipe keeps the ingredient list simple.
Beeswax, shea butter, coconut oil, and common food-grade carrier oils are very different from a balm filled with artificial fragrances or unnecessary concentrated essential oils.
However, paw balm isn’t meant to be eaten as a snack.
A small amount of incidental licking is different from a dog repeatedly consuming spoonfuls of balm.
Too much fat or oil can also upset some dogs’ stomachs.
If your dog immediately tries to lick every trace of balm off:
- Apply a thinner layer.
- Use it before bedtime.
- Distract with a toy or activity for several minutes.
- Consider socks or booties temporarily if appropriate and supervised.
Persistent paw licking deserves attention for another reason too.
Dogs lick their paws because of allergies, irritation, yeast, pain, foreign objects, boredom, and other causes.
If the licking continues even when the pads no longer look dry, the underlying problem may be related to allergies or sensitivities rather than something paw balm can solve.
What Should You Avoid in Homemade Dog Paw Balm?
Simple is usually better.
I would avoid turning a basic paw balm into a complicated homemade aromatherapy blend.
Artificial Fragrance
Your dog doesn’t need their paws to smell like vanilla cupcakes.
Fragrance adds no meaningful paw-care benefit and may increase the chance of irritation.
Unnecessary Essential Oils
Essential oils are highly concentrated.
Some can irritate skin, and safety varies considerably depending on the oil, concentration, route of exposure, and the individual dog.
For an everyday paw balm, they simply aren’t necessary.
If your dog also struggles with dry or itchy skin at bath time, a gentle homemade dog shampoo may be worth considering.
Applying Balm Over Dirty Paws
Clean first, balm second.
Otherwise, you risk coating salt, dirt, sand, or other irritating material against the paw.
Covering an Open Wound With Homemade Balm
A cosmetic balm is intended for dry skin and minor surface roughness.
It’s not a sterile wound dressing.
If the paw is bleeding, deeply split, burned, draining, swollen, or visibly infected, it’s time to stop experimenting with home remedies and have the paw evaluated.
When Paw Balm Isn’t Enough
A good paw balm can be extremely useful for routine care, but it can’t fix every paw problem.
Contact your veterinarian if you notice:
- Deep cracks or splits
- Bleeding
- Pus or unusual discharge
- Significant swelling
- A strong or unusual odor
- Blisters or burns
- Sudden color changes
- Lumps or growths
- Limping
- Reluctance to put weight on a paw
- Constant chewing or licking
- Cracking that continues despite consistent basic paw care
Recurring paw problems can sometimes be connected to itchy skin and allergy-related issues, infection, environmental irritation, abnormal gait, or other underlying conditions.
In those situations, moisturizing the surface may make the paws feel better temporarily without addressing the real cause.
Final Thoughts
Homemade paw balm doesn’t need to be complicated.
With beeswax, shea butter, coconut oil, and one simple carrier oil, you can make a small batch in about 10 minutes and keep it ready for dry weather, rough trails, winter walks, and everyday paw maintenance.
Use a thin layer, start with clean and dry paws, and pay attention to what the paw pads are telling you.
For ordinary dryness and mild surface roughness, consistent moisturizing and protection may make a noticeable difference.
For deep cracks, bleeding, burns, swelling, pain, or persistent licking, paw balm should be supportive care rather than the whole solution.
Simple recipe. Simple routine. Healthier, more comfortable paws.